druid
Well-Known Member
Step by step guide, with pics.
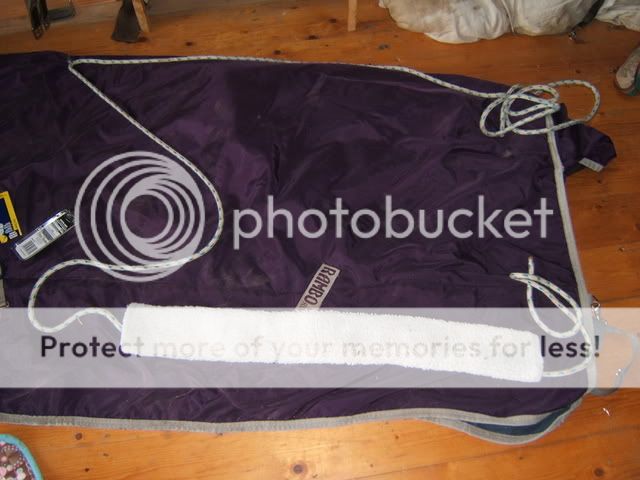
Assemble all materials:
2 x spring clips
1 x swivel spring clip
12m of rope (I used two 6m lengths of 8mm marine gauge polypropylene in red and white/blue, this makes sorting out the Pessoa for atatchment much easier as it's basically colour coded!)
Electrical tape
Scissors
Fake fur girth sleeve
A horse's rug to help with measurements
Step 1.
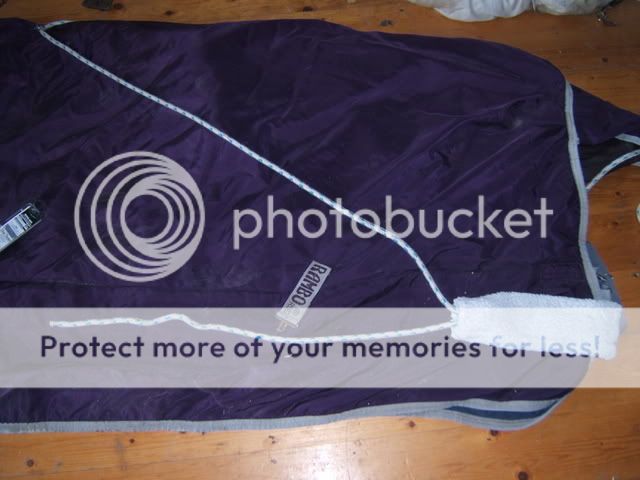
Take your first 6m length of rope and thread it though the swivel clip so it sits in the middle of the rope, like so

Step 2
Clip the swivel clip to the approximate place a roller would lie on the rug. Measure the length of rope on one side required to reach the hocks (fillet string :w") and thread through the girth sleeve until this point.
and thread through the girth sleeve until this point.
Step 3
Do the same with the rope on the other side of the clip but thread it through the girth sleeve from the opposite side.
Step 4
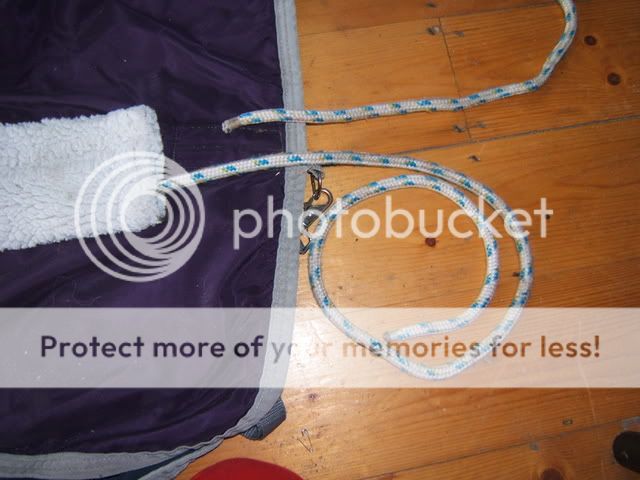
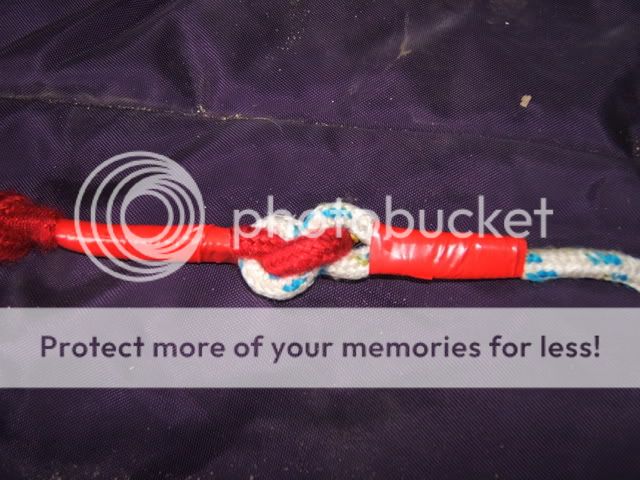
Cut the other 6m rope into two 3m sections. Attach one of these 3m pieces to the loose end of rope protruding from the girth sleeve. With a square knot and electrical tape the loose tails back to thier respective ropes.

Step 5
Thread the rope through one of the spring clips. Double the rope back on itself to make a loop and secure with a Taut line knot. (This knot allows direct adjustment of the loop size but does not move under pressure). Tape the tail end to the rope which emerges from the knot (i.e not the rope which the knot slides on!!)


Step 6
Repeat steps 4 & 5 on the other side of the Pessoa with the other 3m section of rope. The end!
Fitting
Nb. Please note in these pictures the horse wear's an elastic surcingle which should NOT be used for lunging - these pics were taken for reference only. The fur sleeve is also a little low in these pics. (Also excuse muddy, pissed off horse
 )
)
Position 1
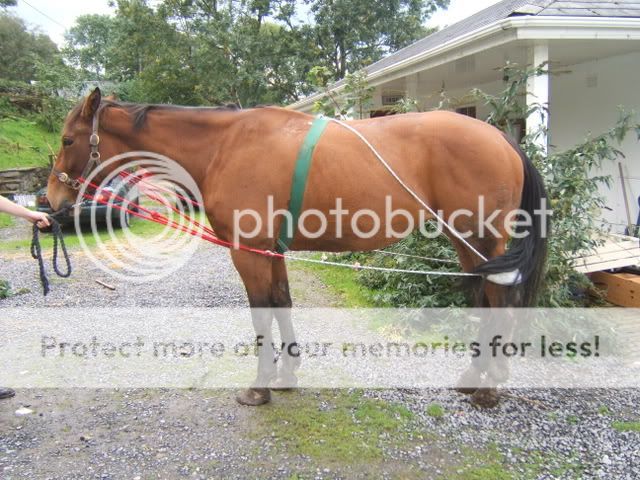
The swivel clip attaches to the crupper/top dee of the roller (imagine people, imagine :w. The red rope runs up the sides, through the bit ring and goes between the front leg to be clipped to the martingale/draw rein dee. (The taut line knot is used to adjust the red rope length and thus the fit)
Position 2
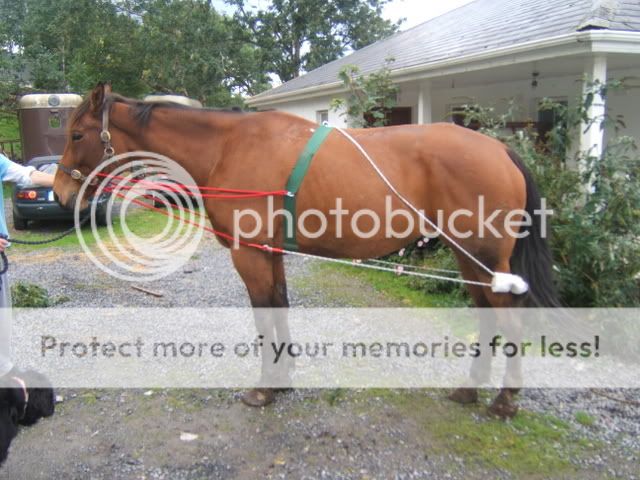
Identical to position 1 except the red line clips attach to the side rein dees.
Position 3
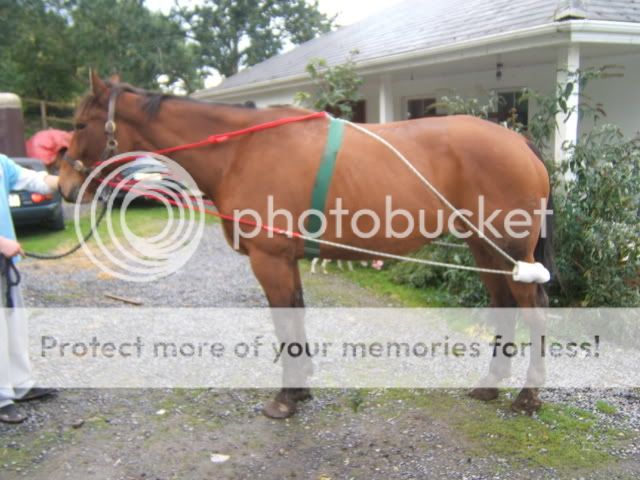
Identical to position 1 except the red line clips attach to the top dee.
Enjoy!
Assemble all materials:
2 x spring clips
1 x swivel spring clip
12m of rope (I used two 6m lengths of 8mm marine gauge polypropylene in red and white/blue, this makes sorting out the Pessoa for atatchment much easier as it's basically colour coded!)
Electrical tape
Scissors
Fake fur girth sleeve
A horse's rug to help with measurements
Step 1.
Take your first 6m length of rope and thread it though the swivel clip so it sits in the middle of the rope, like so
Step 2
Clip the swivel clip to the approximate place a roller would lie on the rug. Measure the length of rope on one side required to reach the hocks (fillet string :w
and thread through the girth sleeve until this point.
Step 3
Do the same with the rope on the other side of the clip but thread it through the girth sleeve from the opposite side.
Step 4
Cut the other 6m rope into two 3m sections. Attach one of these 3m pieces to the loose end of rope protruding from the girth sleeve. With a square knot and electrical tape the loose tails back to thier respective ropes.
Step 5
Thread the rope through one of the spring clips. Double the rope back on itself to make a loop and secure with a Taut line knot. (This knot allows direct adjustment of the loop size but does not move under pressure). Tape the tail end to the rope which emerges from the knot (i.e not the rope which the knot slides on!!)
Step 6
Repeat steps 4 & 5 on the other side of the Pessoa with the other 3m section of rope. The end!
Fitting
Nb. Please note in these pictures the horse wear's an elastic surcingle which should NOT be used for lunging - these pics were taken for reference only. The fur sleeve is also a little low in these pics. (Also excuse muddy, pissed off horse
Position 1
The swivel clip attaches to the crupper/top dee of the roller (imagine people, imagine :w
. The red rope runs up the sides, through the bit ring and goes between the front leg to be clipped to the martingale/draw rein dee. (The taut line knot is used to adjust the red rope length and thus the fit)Position 2
Identical to position 1 except the red line clips attach to the side rein dees.
Position 3
Identical to position 1 except the red line clips attach to the top dee.
Enjoy!


